

Maintaining clean car seats is essential not only for the aesthetics of your vehicle but also for its overall hygiene and longevity. Clean car seats enhance the driving experience by providing a comfortable and welcoming environment, free from stains, dirt, and unpleasant odors. Car seats can generally be classified into two main types: cloth car seats and leather car seats. Each type requires specific cleaning methods to preserve their appearance and durability, ensuring they remain in good condition for as long as possible.
Overview Of The Best Way To Clean Car Seats

Regular cleaning of car seats is paramount to maintaining the vehicle’s interior and ensuring a pleasant driving experience. Over time, car seats accumulate dust, grime, spills, and other contaminants, which not only mar the appearance but can also lead to unpleasant odors and potential deterioration of the seat material. The best approach to keep car seats in pristine condition involves a combination of preventive measures and thorough cleaning techniques.
Firstly, vacuuming the seats regularly helps in removing loose dirt and debris that can embed into the fabric or leather, making them more difficult to clean later. For cloth car seats, using a fabric cleaner or upholstery shampoo specifically designed for automotive use is crucial. These products help in lifting stains and restoring the fabric’s original look. A gentle brush and microfiber cloth can assist in working the cleaner into the fabric and removing excess moisture.
For leather car seats, employing a high-quality leather cleaner and conditioner is indispensable. These products not only clean but also nourish the leather, preventing it from cracking and becoming brittle. It’s essential to use a soft cloth to apply these products and to follow up with a conditioner to keep the leather supple and protected from UV damage.
Preparing For Cleaning
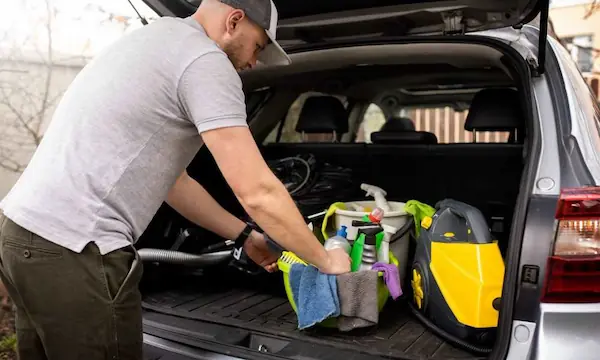
Before diving into cleaning your car seats, it’s essential to gather the necessary tools and materials to ensure a thorough and efficient process. Here is a list of essential tools and recommended cleaning products you’ll need:
Essential Tools:
- Vacuum Cleaner with Crevice Tool: Ideal for removing loose dirt and debris from tight spaces and seams of the car seats.
- Spray Bottle: For easy application of cleaning solutions.
- Microfiber Cloth: Gentle on both fabric and leather, perfect for wiping down surfaces without causing scratches.
- Soft Bristled Brush: Helps to lift dirt and stains from the surface without damaging the fabric or leather.
- Upholstery Cleaning Machine: Optional but highly effective for deep cleaning fabric seats, pulling out ingrained dirt and moisture.
Recommended Cleaning Products:
- Upholstery Cleaner: Upholstery Cleaner is specifically designed for car interiors, effective in removing tough stains and deep-seated dirt.
- Fabric Cleaner: Tailored for cloth car seats, lifts and removes stains while refreshing the fabric.
- Leather Cleaner: Formulated to clean and preserve the delicate surface of leather seats without causing damage.
- Dish Soap: Mild detergent that can be used for spot cleaning.
- Baking Soda: Natural deodorizer and mild abrasive for tackling stubborn stains.
- Laundry Detergent: Can be diluted for use as a cleaning solution for fabric seats.
- White Vinegar: Useful for disinfecting and removing odors.
- Leather Conditioner: Essential for maintaining the suppleness and longevity of leather car seats.
- Fabric Protector: Helps to shield fabric seats from future stains and spills, making maintenance easier.
How To Clean Cloth Car Seats
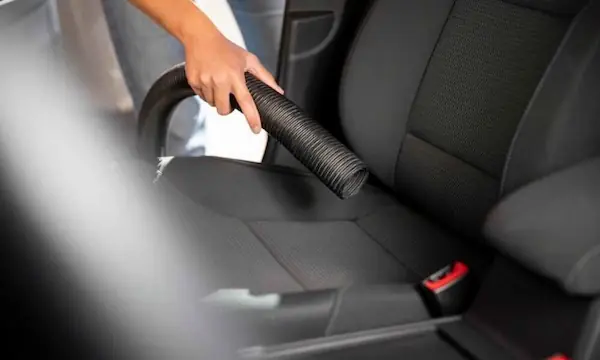
To thoroughly clean cloth car seats, follow these step-by-step instructions:
Step 1. Vacuum the Seats:
Begin by thoroughly vacuuming the fabric car seats using a vacuum cleaner with a crevice tool. This will remove loose dirt, debris, and crumbs from the surface and seams. Ensure you reach into all the nooks and crannies where dirt tends to accumulate.
Step 2. Apply Fabric Cleaner:
Spray a fabric cleaner specifically designed for automotive use onto the cloth seats. Make sure to follow the product’s instructions for the correct amount and application process. For larger areas, working in sections can ensure even coverage and avoid over-saturating the fabric.
Step 3. Scrub with an Upholstery Brush:
Use a soft bristled upholstery brush to gently scrub the upholstery cleaner into the seats. This will help lift stains and dirt ingrained in the fabric fibers. Use circular motions and avoid using excessive pressure to prevent damaging the material.
Step 4. Wipe Down with Microfiber Cloth:
After scrubbing, take a clean, damp microfiber cloth to wipe away the cleaner and lifted dirt. Rinse and wring out the cloth regularly to ensure you’re not redistributing the dirt onto the seats.
Step 5. Addressing Stubborn Stains:
For stubborn stains, you can use club soda or a mixture of baking soda and water. Apply a small amount of club soda directly onto the stain. Alternatively, make a paste using baking soda and a small amount of water. Apply the paste to the stain and gently scrub with a soft bristle brush.
Step 6. Repeat if Necessary:
If the stain persists, you may need to repeat the cleaning process. For deeply embedded stains, allowing the cleaner or baking soda paste to sit for a few minutes before scrubbing can improve results.
Step 7. Dry the Seats:
Once satisfied with the cleaning, ensure the seats are thoroughly dry to prevent mold and mildew. You can accelerate the drying process by using a fan or leaving the car doors open in a well-ventilated area to clean fabric car seats.
How To Clean Leather Car Seats
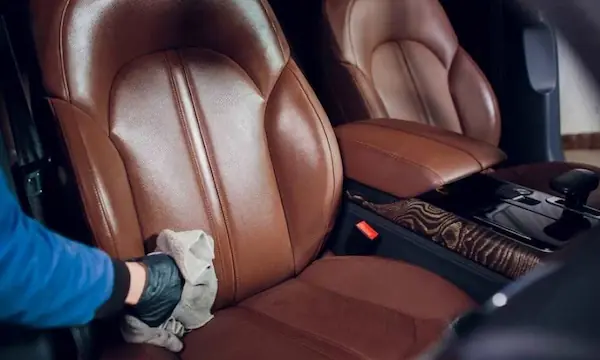
Maintaining leather car seats involves a meticulous process to ensure they remain supple, clean, and free from damage. Here are detailed steps on cleaning leather car seats effectively using leather cleaner and leather conditioner:
Step 1. Vacuum the Seats:
Start by vacuuming the leather seats to remove loose dirt and debris. Use a vacuum cleaner with a soft brush attachment to avoid scratching the leather surface.
Step 2. Apply Leather Cleaner:
Spray a quality leather cleaner onto a microfiber cloth rather than directly onto the entire seat. This prevents oversaturation and helps control the amount of cleaner used. Gently rub the cloth in circular motions over the leather surface, ensuring you cover all areas, particularly seams and crevices where dirt can accumulate.
Step 3. Scrub with a Soft Brush (if necessary):
For areas with heavier dirt or stains, use a soft-bristled brush to gently scrub the leather cleaner into the surface. Maintain light pressure to avoid damaging the leather. Focus on one section at a time for thorough cleaning.
Step 4. Wipe Down with a Clean Cloth:
After applying the cleaner and scrubbing any stained areas, take a clean, dry microfiber cloth to wipe away any residue. This step ensures that the leather is free from excess cleaner and any lifted dirt.
Step 5. Apply Leather Conditioner:
Once the seats are clean, it’s crucial to apply a leather conditioner to maintain the leather’s health. Using a soft cloth, apply a small amount of conditioner to the leather’s surface, working it in with gentle circular motions. This will help the conditioner penetrate deeply into the leather, nourishing and protecting it.
Step 6. Buff the Leather:
After applying the conditioner, use a clean, dry microfiber cloth to buff the seats. This not only helps distribute the conditioner evenly but also gives the leather a polished, natural sheen.
Step 7. Allow to Dry:
Let the leather seats dry completely before using the car. Keeping the car doors open in a well-ventilated area or turning on the car’s air system can help expedite the drying process.
Removing Stains From Car Seats
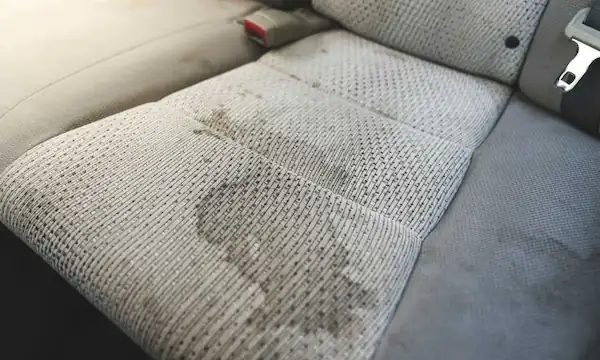
Car seats can fall victim to a variety of stains as we go about our daily lives. From spills and dirt to more stubborn contaminants, recognizing the type of stain is crucial in determining the most effective treatment. Here we will explore common types of car seat stains and how to treat them using DIY cleaners and fabric upholstery techniques.
Common Types Of Car Seat Stains
- Food and Drink Stains: Spilled coffee, juice, or food items can leave unsightly marks on your car seats.
- Grease and Oil Stains: These can come from various sources, including food, mechanical work, or skin oils.
- Ink Stains: Commonly caused by pens, these can be particularly tricky to remove.
- Mud and Dirt Stains: Especially common in wetter climates or with active lifestyles.
- Pet Stains: If you have pets, you might encounter urine, drool, or other animal-related stains.
DIY cleaners and home remedies provide natural and cost-effective solutions for keeping your home clean and healthy. By utilizing common household ingredients, you can achieve excellent results without the need for expensive or chemical-laden products.
For Food And Drink Stains
- Dish Soap Solution: Mix a few drops of dish soap with warm water. Use a clean cloth to apply the soapy solution to the stain. Gently scrub in a circular motion, then blot with a dry cloth.
- Club Soda: Pour a small amount of club soda onto the stain and scrub gently with a soft brush. Blot with a clean cloth.
For Grease And Oil Stains
- Baking Soda Paste: Make a paste by mixing baking soda and water. Apply the paste to the stain and let it sit for 15 minutes. Scrub gently with a brush, then wipe clean with a damp cloth.
- Cornstarch and Vinegar: Sprinkle cornstarch on the stain to absorb the oil. After a few minutes, vacuum up the cornstarch, then clean the area with a solution of white vinegar and water.
For Ink Stains
- Rubbing Alcohol: Dab a small amount of rubbing alcohol onto a cotton ball or cloth, and gently blot the ink stain. Be cautious, as alcohol can potentially fade some fabric colors.
- Hairspray: Spray a small amount of hairspray onto the stain and blot with a cleaning cloth. This can help break down the ink for easier removal.
For Mud And Dirt Stains
- Baking Soda and Water: Make a thin paste with baking soda and water. Apply it to the stain and let it sit for a few minutes before scrubbing gently. Wipe clean with a damp cloth.
- Vinegar Solution: Mix equal parts white vinegar and water in a spray bottle. Spray the solution onto the stain and scrub with a soft brush. Blot with a clean, dry cloth.
For Pet Stains
- White Vinegar & Baking Soda: First, blot up as much of the stain as possible. Lightly spray a mixture of equal parts white vinegar and warm water onto the stain, then sprinkle baking soda over the area. Let it sit and foam for a few minutes before scrubbing and wiping with a damp cloth.
- Enzyme Cleaner: If vinegar and baking soda don’t fully remove the stain from your car’s interior, an enzyme cleaner designed for pet stains can break down the organic material and eliminate odors.
DIY VS Professional Cleaning
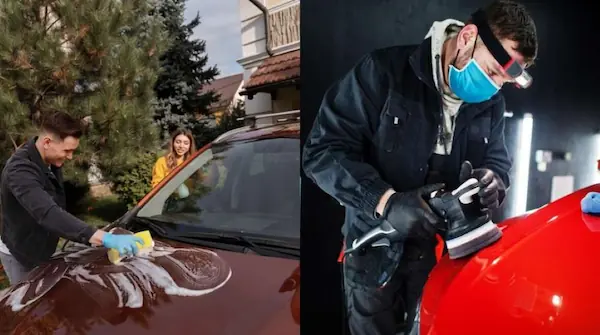
Maintaining the cleanliness of your car seats and car’s interior can be approached through either DIY methods or professional cleaning services. Each option has its own set of pros and cons, making it essential to understand these differences to choose the most suitable method for your needs to clean dirty car seats.
Pros And Cons Of DIY Cleaning
Pros:
- Cost-Effective: DIY cleaning methods often use common household items like dish soap, baking soda, and vinegar, making it an inexpensive option.
- Convenience: You can clean your car seats at your own pace and whenever it suits your schedule.
- Control Over Products Used: For those concerned about chemicals, DIY allows you to choose natural, eco-friendly cleaners.
Cons:
- Time-Consuming: Thorough cleaning can require significant time and effort, especially for heavily stained surfaces.
- Variable Results: Without professional equipment and expertise, results can be inconsistent. Some tough stains might remain despite repeated cleaning attempts.
- Risk of Damage: Incorrect techniques or products can potentially damage the upholstery, making it crucial to follow guidelines precisely.
Pros And Cons Of Professional Cleaning
Pros:
- Expertise and Equipment: Professional cleaners, such as Service King and Stanley Steemer, have specialized knowledge and tools designed to handle a wide variety of stains and fabric types effectively.
- Comprehensive Cleaning: A professional service can provide a deep clean that may be difficult to achieve with DIY methods, ensuring all dirt, stains, and odours are thoroughly addressed.
- Time-Saving: Outsourcing the task allows you to focus on other activities while experts take care of the cleaning.
Cons:
- Cost: Professional cleaning services come at a higher price point compared to DIY methods, which might not fit everyone’s budget.
- Scheduling: You need to arrange and possibly wait for an appointment, which might not be as flexible as handling the task yourself.
- Chemical Use: Some services may use strong chemicals that might not align with everyone’s preferences for natural cleaning solution.
Cleaning Car Seat Accessories
Maintaining a clean car interior extends beyond just the seats. Ensuring that car accessories like floor mats, the steering wheel, car windows, and the center console are clean creates a more enjoyable and hygienic driving experience.
How To Clean Floor Mats
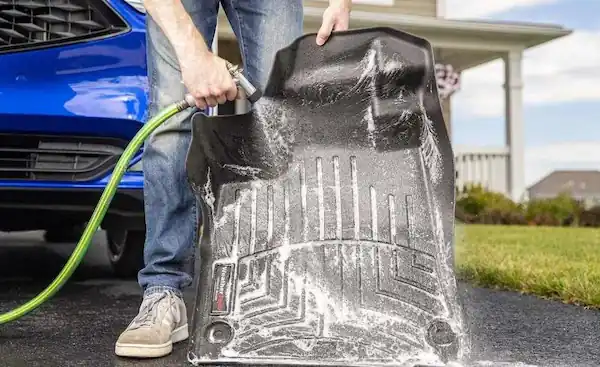
Vacuuming: Remove the floor mats from your car and vacuum both sides thoroughly to remove loose dirt and debris.
Washing: For rubber mats, use a hose to rinse off dirt, then scrub with a mixture of water and mild detergent. For carpet mats, use a carpet cleaner or a mixture of water and car upholstery cleaner. Scrub gently with a brush.
Drying: Allow the mats to completely dry before placing them back in the car to prevent mold and odors.
How To Clean The Steering Wheel
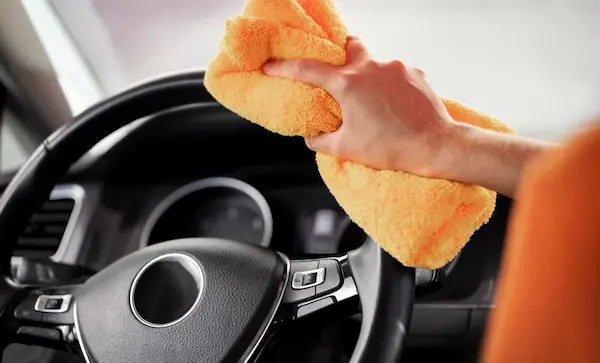
Surface Wipe: Use a damp cloth with a small amount of mild soap or car interior cleaner to wipe the steering wheel.
Disinfect: Given the high-touch nature of the steering wheel, use a disinfectant wipe to ensure it is not just clean but also free of germs.
Condition: If your steering wheel is leather, apply a small amount of leather conditioner after cleaning to maintain its suppleness.
How To Clean Car Windows
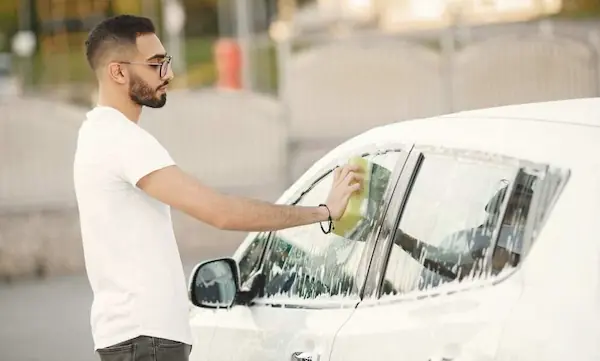
Cleaning Solution: Use a glass cleaner that is specifically formulated for car windows to avoid streaks. Spray it onto a lint-free microfiber towel.
Wiping: Wipe the windows in a circular motion and then follow with vertical or horizontal strokes to ensure there are no streaks.Car Seat Care
Detailing: Pay extra attention to the edges and corners, as these areas often accumulate the most grime.
How To Clean The Center Console
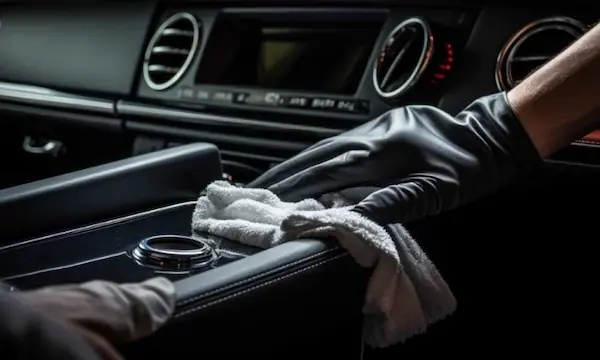
Vacuuming: Use a handheld vacuum to remove crumbs and dust from cup holders, storage compartments, and other crevices.
Wiping Down: Apply a small amount of car interior cleaner or a mixture of water and mild soap to a wet cloth and wipe down all surfaces. Be sure to clean buttons, knobs, and touch screens carefully.
Finishing Touch: Use a dry cloth to remove any leftover moisture and give the surfaces a final polish.
Importance Of Using The Right Tools
Brush Attachment: Ideal for scrubbing dirt and grime from mats without damaging the material, and useful for getting into tight crevices.
Handheld Vacuum: Essential for quickly and efficiently removing loose dirt and debris from various parts of the car interior.
Damp Cloth: Versatile for wiping down surfaces, applying cleaning solutions, and removing residues without scratching delicate surfaces.
Conclusion
Maintaining clean car seats is essential for both aesthetics and hygiene. To keep your car seats in top condition, vacuum regularly to remove loose dirt and debris. Use appropriate cleaners—fabric cleaner for cloth seats and a high-quality leather cleaner and conditioner for leather seats. Gently scrub cloth seats with a soft-bristled brush and use a microfiber cloth for leather seats to avoid damage. Address stains promptly with suitable cleaners, such as baking soda paste for grease or club soda for food and drink stains. Regularly apply leather conditioner to keep leather seats supple and prevent cracking. Ensure seats are thoroughly dry after cleaning to prevent mold and mildew. By performing regular maintenance, you can preserve your car’s interior, enhance its aesthetic appeal, and ensure a comfortable, hygienic driving experience. Regular upkeep not only protects your investment but also makes every drive more enjoyable.